You'll need to create a Spinify user for any person that you want to partake in your Competitions. This could be in an admin, player or fan capacity.
If you have a lot of users, scroll to the bottom and start from the "Lots of users to add?" heading.
Otherwise, follow the steps below to create individual users.
Note: This process is different for Salesforce Integrations - see Salesforce steps at the bottom of this article.
Go to the Users page
- Log into your MySpinify account
- From the left-hand menu click the "Users" icon to navigate to the "Users" tab
- Select "Add User" in the top right of the page
Create Your New User
User
Here you'll enter the details of your new user. We need to have at least the information below:
- First Name
- Last Name
- Email (keep in mind that integrations require your users to have the same email in MySpinify as they do in your chosen integrations)
Now it's time to choose a license. We have three License types available:
- ⚙️Admins: who have the same privileges as players but can also create new leaderboards and turn features on and off
- 🏆Players: who participate in Leaderboards and use the Spinify phone app
- 🙌Fans: who are view-only participants. You can add them to leaderboards for visibility, but they're not active participants in the competitions
Avatar
The next step is to choose an avatar for your new user. You can either upload a photo of the user, choose from one of 160+ pre-made avatars, or have Spinify assign an avatar by skipping this step.
Your users will be able to update their avatars through the phone app later, so don't worry if you've assigned an avatar with the wrong hair colour!
Achievement Sound
Lastly, you can choose an alert sound or Music Video for your user. If you have speakers attached to your TV, this will play whenever the user earns an achievement, such as closing a sale. We recommend choosing a custom sound or Music Video, as this will personalize the experience for your users. However, a default achievement sound will be used if you don't upload one. You can always add custom sounds and videos later as well.
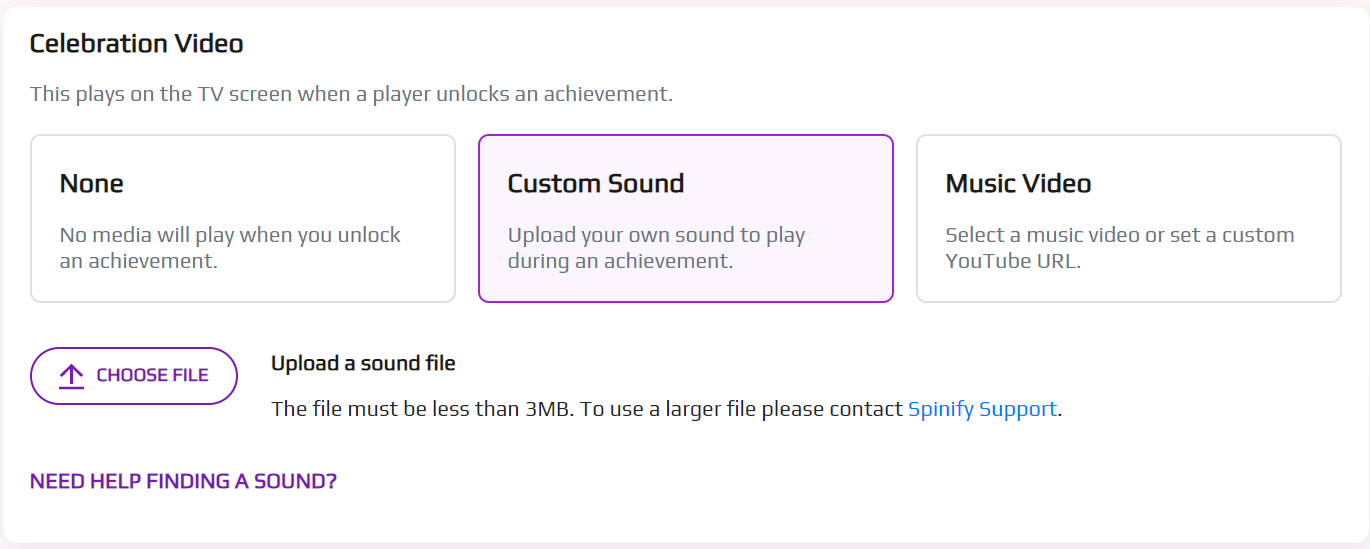
If you need help finding the right sound, click the "Need Help Finding A Sound?" link or check out our Sound Effects guide for inspiration!
Now press "Save" at the bottom of the form and the new user will be created in Spinify! You can now add your user to any new and existing Competitions! YAY!
Mapping Users to External Apps
There are some additional steps for mapping users to external systems.
Salesforce
To add and Link your Salesforce users, you will need to log into your Salesforce account first. Then go to the Spinify Setup tab and choose "Setup Users". From here you can either link or add your Salesforce users to your Spinify account. See: Add/Link Salesforce Users or, if you have lots of Salesforce users to add, check out Bulk Create Users Linked To Salesforce.
Slack / Freshdesk
You'll need to map Slack and Freshdesk users to your new MySpinify user. To do this, go to the Integrations page in MySpinify and click the cog in the top right of your Slack or Freshdesk integration tile. See: Slack Integration Article / Freshdesk Integration Article.
GoogleSheets / Zendesk / Jira
Your MySpinify users MUST have the same email addresses as your Integration users. Otherwise, the integration won't work. Make sure to triple check your users' email data so that they map correctly.
Lots of Users to Add?
We have an easy to use bulk CSV upload option to populate the users in your Spinify account.
Please note: some CRMs, such as Salesforce, and Agentbox can sync your users across to Spinify after you integrate them.
Here's how to bulk upload your users:
- From the left-hand menu click "Users" then click "Users"
- At the top right of the Users page click on the three verticle dots, then select "Upload CSV", as shown below:
- Follow the instructions in the pop-up message and download the CSV template. Out template will make sure you use the correct format for uploading your users. Not following the CSV template will cause issues with your user bulk upload so make sure to stick to the template format.
Tip: Make sure that any dates on your CSV file are in DD/MM/YYYY format. - Once you create your CSV with your users simply click the 'Upload CSV File' button in the pop-up window and you're good to go!
Note: It will take a few minutes to get your users nice and cozy in Spinify. You can refresh your page to see the latest users added to your account.