📊 What Are Personal Metrics?
Personal Metrics in Spinify are just like competitions—but with a unique twist. Instead of racing against others, Metrics let players focus on their own goals. Think of it as a personal leaderboard where each player or team works towards their key performance indicators (KPIs), helping drive motivation, accountability, and results.
💡 Why Use Personal Metrics?
-
Boost engagement with tailored challenges
-
Foster a growth mindset through individualized tracking
-
Keep team members focused on what really matters
-
Enable private coaching or celebrate public milestones
Whether you’re motivating quietly or cheering each other on loudly, Metrics are your go-to tool for performance momentum.
🎯 Setting Up Personal Metrics
Admins can create customized Metrics based on the goals that matter most—whether it’s sales calls made, deals closed, tasks completed, or any other performance benchmark.
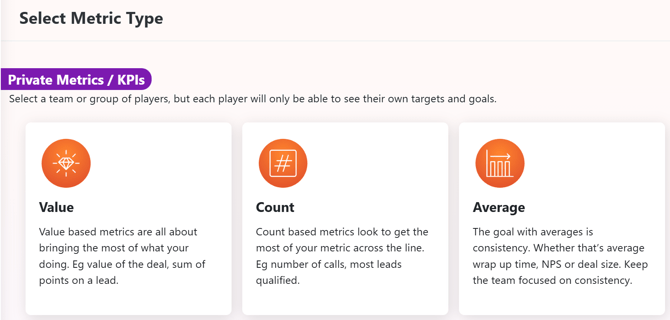
When setting up a Metric, you can choose between two visibility options:
-
🔐 Private Metrics: Only the player or team and the admin can see the goal and progress. Perfect for sensitive targets or personal development goals.
-
🌟 Public Metrics: Everyone can see each other’s progress, which promotes transparency, collaboration, and friendly motivation across the team.
Follow the steps below for setting up your Personal Metrics:
1. Access Competitions- Log into your MySpinify account
- From the left-hand menu, click the "Competitions" icon

- Navigate to the "Metrics" tab

- From the Metrics page, you can click the "Create Metric" button at the top right.
Decide whether your Metric will be Private, or Public and select a corresponding design. In this example, we're going to click anywhere on the box that says "Value" under Public Metrics.
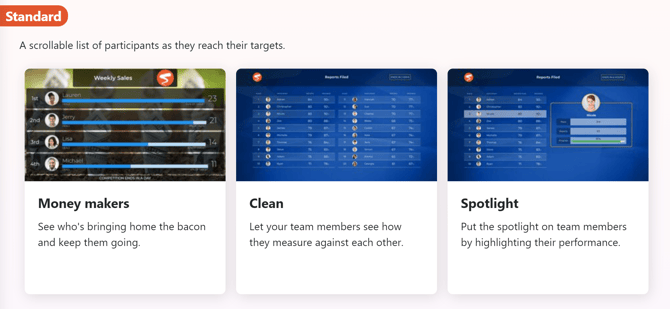
Note: If you select a private metric, you will skip picking a leaderboard design, as they do not display in your Channels.
3a. Use Spinify SidekickSelect the tone you'd like for your Metric: Playful, Balanced, or Serious. Next, select from one of the AI-generated options based on your company's needs and goals.

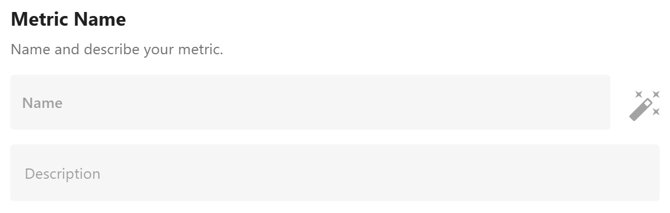
Enter a name and optional description. These details will be displayed on the top of the Metric and in the mobile apps to let your team know what type of Metric it is. Try to get creative with themes E.G.
- Name "Top of the Mountain"
- Description "Reach the top! Make 100 sales"
The Duration controls how long the Metric should run. You can choose the "Duration Type" to be:
- One-Off - To start at and end on the dates that you specify. If you want the Metric to start immediately, do not change the "Start Date & Time".

Note you can also schedule Metrics to start in the future so that you can use them for upcoming events.
- Recurring Daily - To recur daily, ending at midnight and starting again for the new day.
- Recurring Weekly (Sunday - Saturday) - To recur each week, starting on Saturday and ending on Sunday.
- Recurring Weekly (Monday - Friday) - To recur each week, starting on Monday and ending on Friday.
- Recurring Weekly (Monday - Saturday) - To recur each week, starting on Monday and ending on Saturday.
- Recurring Monthly - To recur monthly, ending at midnight of the last day of the month and starting again for the new month.
- Recurring Every 2 Weeks (Monday - Sunday) - To recur every second week starting on Monday and ending on Sunday.
- Recurring Every 2 Weeks (Sunday - Saturday) - To recur every second week starting on Sunday and ending on Saturday.
- Recurring Quarterly - To recur every three months starting from the current month.
Note: If you select Monthly or Quarterly, you can also select to have your metric only start/end on the nearest weekday:

If you have integrated another app with Spinify, make sure you're on the "Connected Apps" Option, then select your integration filter. The trigger goal is what your staff needs to reach to win. A few different examples are: if you want them to make Sales, then you would Select “Deals Won” or make calls, then choose “Calls Made”.
The options you see will depend on the Integrations that you have connected.

You now have the option to set a Target. You have three options here. Either:
1. Turn off the target. This will use the participant in first place as the target for the Metric. For Example, if Fred is coming first with a score of 10 and John has a score of 6, then Fred will have a full progress bar of 100%, while John's will be 60%.
2. Choose the same target for everyone, meaning everyone will chase the same goal.
OR
3. Create an individual target. If you choose to give individual targets, you will choose their targets in the Users section lower down the form.
Note: If you choose the "Value of" target, then you can also choose the "Field to calculate" to make sure the metric is using the field you want the score to come from.
For Google Sheets, you will need to choose the sheet and columns for the user's email and score. For more info, read How To Configure Google Sheets for Spinify Competitions.
Lastly, you can set the target name that you'd like displayed on the Metric. This should be the name of the metric the participants are trying to do to get points.
Before adding Participants, you need to decide whether the Metric will be challenging Teams (groups of users working together) or Users (everyone competing for their own target).
Please note teams are only available to organizations on Growth, Enterprise, and Pro plans.

Once you select the type, you will be able to add your choice to the Metric (Users or Teams).
Note: You can't have a Metric that includes both Teams and Users. If you change the type field, it will remove any added participants.
Select a user or team from the "Add User"/"Add Team" drop-down, and they will be added to the list of participants.
You may also just press "Add All Users"/"Add All Teams" to add all the users/teams from your account to the Metric.
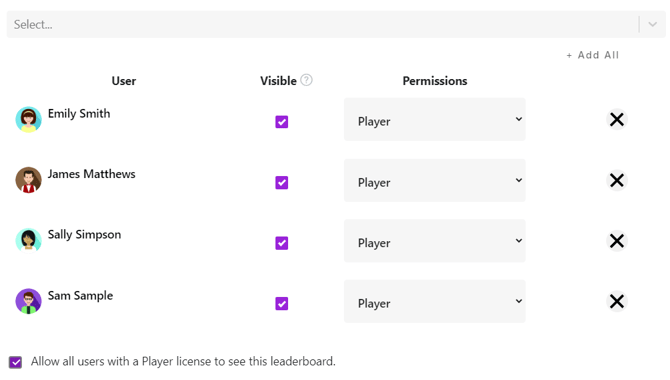
Ensure to also stipulate if the participant is a Player or a Spectator.
If you have chosen an incorrect participant, click the "X" on the row of the participant to remove them.
You can also change the Target per user if you chose "Individual Targets" in the Goal section. More info in How do I create individual targets?
At this point, it's also possible to create your Metric by clicking the "+ Add Metric" button (if it's disabled, then the required information is missing and needs to be filled in).
Or you can also click next to customize the display settings for your metric.
Optional Settings
1. Add Your Metrics To ChannelsIf you have some channels set up, and you've selected a Public Metric, you can choose to add them to a channel here. When you create the metric, it will automatically be added to any channels you select. You can also change the slider to determine how long your Public Metric will display on your TV.

If you haven't set up your channel yet, you can do so after you finish creating your Metric. See TV Channels for more info.
2. Change The LayoutThere are many options to make your Public Metric suit your visual needs. Whether that is for practical changes, such as limiting the number of users displayed or just making it more visually impressive.

There are optional screens that can accompany a Public Metric when it's played on your TV. You can choose whether or not to enable the Profile Screen. Before a Metric is shown, a participant with interesting stats may be shown. For more info, see Player Profile screen.
3. Set the Gamification Rewards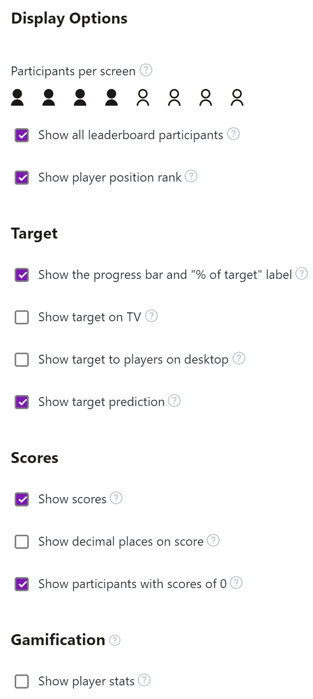
Then set your reward. This is the number of gamification points given to anyone that reaches the target. You can adjust the number of points given to all players, as well as change the rule for who is the winner(s) of the metric, which will then add to their scores.

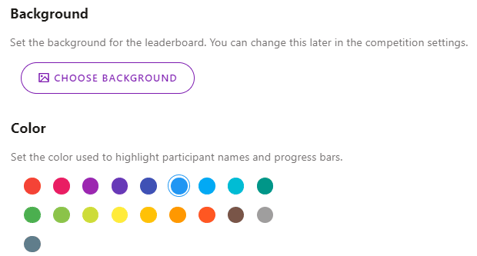
You can choose from over 1000 different backgrounds for your metrics. You also have the option of choosing video or image backgrounds, as well as uploading your own custom background.
Feeling a little Spicy?You can randomize your leaderboard backgrounds – so every time your metrics recurs, you’ll get a brand new background to keep things ✨fresh, fun, and full of flair✨.
It’s super easy:
-
Click “Select TV Background”
-
Pick your fave image or video category
-
Choose the randomizer option
-
Viola! New vibes every time! 🎨🎬
Note: If you upload an image and want it to fit nicely, your image should be in a 16:9 ratio. So a resolution of 1920x1080 is optimal.
AI generated backgrounds are now available via Sidekick, whether you want skydiving samurai kittens, or pirates riding unicorns into battle wielding bananas as swords, the sky is the limit. Simply, type in your idea and watch the magic unfold!

You can also select which color you want to highlight your participants and progress bars in.
Create Your Personal MetricOnce you're satisfied with the settings for your metric, click "+ Add Metric". The metric will then be created and added to your Metric list. Or, if you're not quite ready to publish the Metric, you can select "Save Draft". This will keep the Metric invisible to your players until you're ready to publish.
The If you selected a Public Metric, the Metric will appear on the TV at the Start Date & Time you selected in step 4.
Note: if you already have your TV running the channel that you added your Metric to, or showing the Launch TV option, it may take up to 10 minutes to get added to the rotation. If you manually refresh the TV, it will be part of the rotation immediately.